Author: yke

  • Electric Orange, Perfect Angle: Living With the Louis Poulsen AJ Table

    Electric Orange, Perfect Angle: Living With the Louis Poulsen AJ Table

    Some lamps illuminate a room. The AJ Table lamp edits it. A sharp cone of light, one decisive diagonal and a colour that refuses to whisper: in Electric Orange, Arne Jacobsen’s familiar silhouette becomes less like an appliance and more like punctuation.
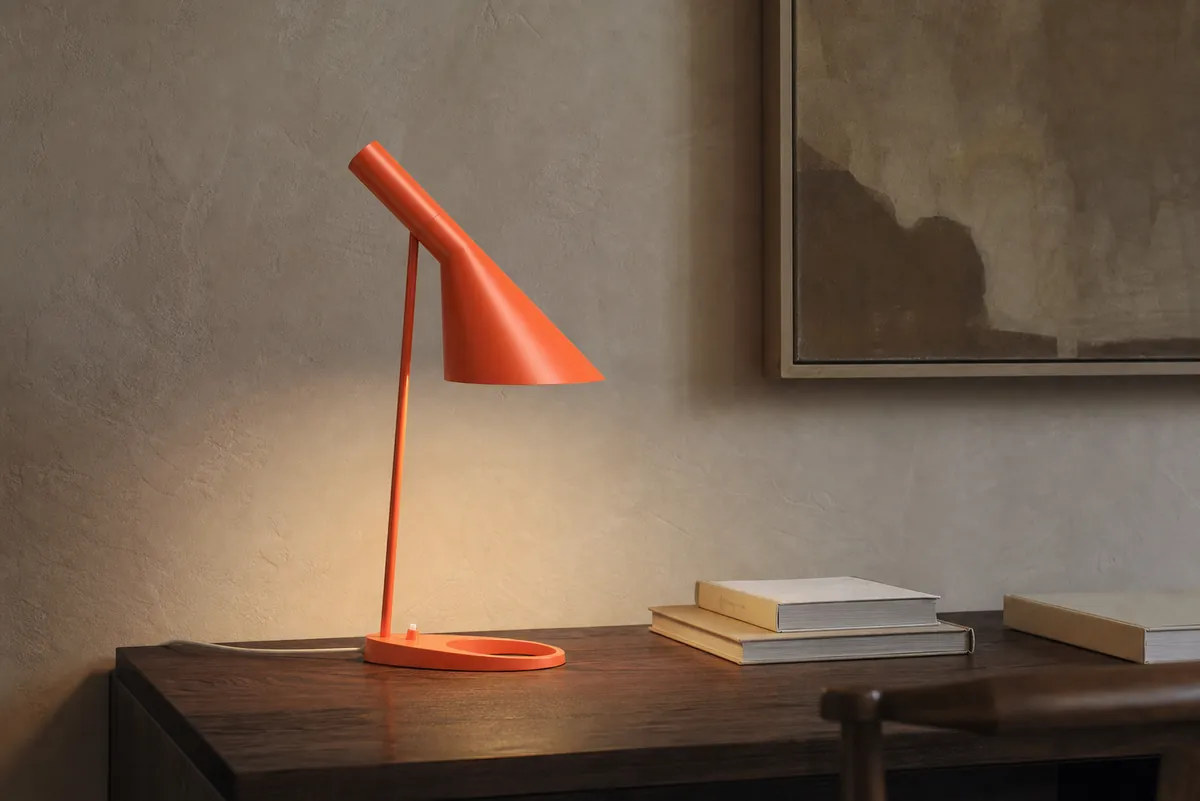
    Louis Poulsen AJ Table lamp in Electric Orange on a dark wooden desk
    The AJ Table in Electric Orange. Editorial image based on the lamp’s original form.

    Designed as part of a complete world

    Jacobsen designed the AJ family for Copenhagen’s SAS Royal Hotel, where architecture, furniture, textiles and lighting were conceived as a single environment. The lamp’s asymmetric shade directs light exactly where it is needed while shielding the eye from glare. That practical purpose is what gives the object its unmistakable expression.

    The shape looks effortless, but it is full of tension: a heavy oval base, a thin vertical stem and a shade that appears to lean forward with intent. Nothing is decorative in the usual sense. The character comes from proportion and direction.

    Why Electric Orange works

    In black or white, the AJ can behave almost like architectural hardware. Electric Orange changes the conversation. It makes the lamp visible even when switched off and brings warmth to stone, dark wood, old paintings and stacks of books.

    That is precisely why it works in an interior that mixes periods. The orange does not attempt to match the room. It gives the eye a point of focus and prevents a collection of serious design objects from becoming too polite.

    A good accent colour does not ask permission from the rest of the room.

    Light with boundaries

    The AJ is not designed to fill every corner with uniform brightness. It creates a controlled pool of light for reading, working or highlighting an object. The shade can be adjusted, turning illumination into something composed rather than merely available.

    This makes it especially effective in the evening. Instead of flattening the room with ceiling lights, one lamp produces contrast: a bright page, a glowing wall and shadows that allow materials to keep their depth.

    A design that still feels direct

    Many mid-century objects survive because nostalgia protects them. The AJ survives because it remains useful. Its form is graphic without becoming a logo, recognisable without becoming fragile, and expressive without demanding an empty gallery around it.

    Louis Poulsen still produces the AJ Table in several finishes, including Electric Orange. The continuing appeal is easy to understand: it solves a lighting problem and, almost as a side effect, gives the entire room more confidence.

    Product background and current specifications: Louis Poulsen AJ Table documentation.

  • The Long Way West: A Northern Spain Road Trip

    The Long Way West: A Northern Spain Road Trip

    The northern coast of Spain does not reveal itself all at once. It arrives in fragments: a flash of Atlantic blue between eucalyptus trees, a stone harbour at the bottom of a hill, the smell of woodsmoke outside a roadside bar. The quickest route west is perfectly competent. The coastal route is much better.

    This journey begins in Bilbao and follows the Bay of Biscay through Cantabria and Asturias. There is no strict checklist. The idea is to keep the ocean on the right, choose the smaller road whenever it looks interesting and stop before the scenery becomes background noise.

    A car following a winding road above Spain’s northern Atlantic coast
    The road west, where every bend suggests another unscheduled stop. Editorial illustration.

    Bilbao in the rear-view mirror

    Bilbao is a difficult city to leave early. There is always another coffee, another pintxo and another building that deserves a detour. But once the city loosens its grip, the landscape changes quickly. Industry gives way to steep green slopes and glimpses of water. The motorway offers speed; the old coast road offers a story.

    The first useful rule of this trip is simple: do not measure progress in kilometres. A short distance can contain a fishing port, a cliff walk, two plates of anchovies and an unexpectedly serious conversation about cider. This is not inefficiency. This is the entire point.

    Castro Urdiales: the first taste of the coast

    Castro Urdiales feels like a transition between urban northern Spain and the wilder coast ahead. Its medieval church stands above a harbour filled with working boats and weekend walkers. The promenade is polished, but the smell of salt and diesel keeps it honest.

    It is an ideal first stop: long enough to stretch the legs, short enough not to destroy the day. Walk around the old harbour, order something from the sea and resist the urge to convert the journey into an optimised spreadsheet.

    The best road trips leave enough empty space for a place you did not know you needed.

    West through Cantabria

    Beyond Castro Urdiales, the road begins its rhythm of green headland, pale beach and compact town. San Vicente de la Barquera appears almost theatrically, with water on both sides and mountains rising behind it. On a clear day the Picos de Europa hover in the distance like scenery borrowed from another trip.

    Lunch is best kept uncomplicated: grilled fish, tortilla, bread and a cold drink. Northern Spain rewards appetite but punishes over-planning. Choose the busy room, order what seems to be moving fastest from kitchen to table and save the research for later.

    Llanes after the day-trippers leave

    Llanes is the kind of place that changes character by the hour. During the day, the harbour and old town are animated. Toward evening, the streets empty, shutters close and the sea becomes louder. Above town, the Paseo de San Pedro runs along a grassy cliff with views that make every phone camera look briefly competent.

    The harbour wall is protected by the Cubes of Memory, giant concrete blocks transformed into bright geometric art. They are playful, slightly strange and completely at home against the grey Atlantic. It is a good reminder that coastal towns do not have to choose between tradition and personality.

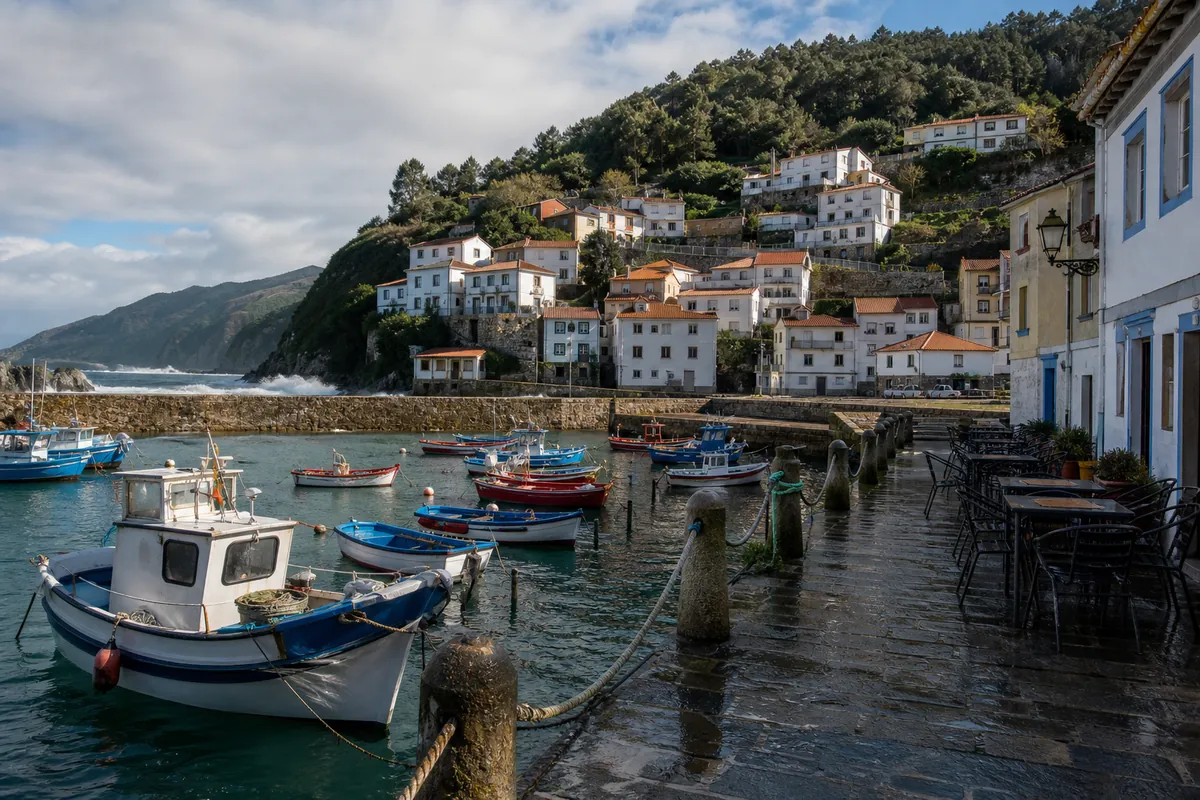
    Colourful boats in a quiet fishing harbour on Spain’s north coast
    A rain-washed harbour somewhere between the mountains and the Atlantic. Editorial illustration.

    The smaller road into Asturias

    Asturias announces itself through scale. The cliffs feel taller, the beaches more hidden and the valleys more intensely green. The main road is excellent, but the memorable sections are the exits that drop toward villages whose names were never part of the plan.

    Ribadesella offers a broad estuary and elegant seaside houses. Cudillero is a cascade of colour around a tiny amphitheatre-shaped harbour. Luarca spreads across two hills, joined by bridges and watched over by a white cemetery high above the sea. Each place could absorb a day; on a road trip, each becomes a vivid chapter.

    A quiet base in the west

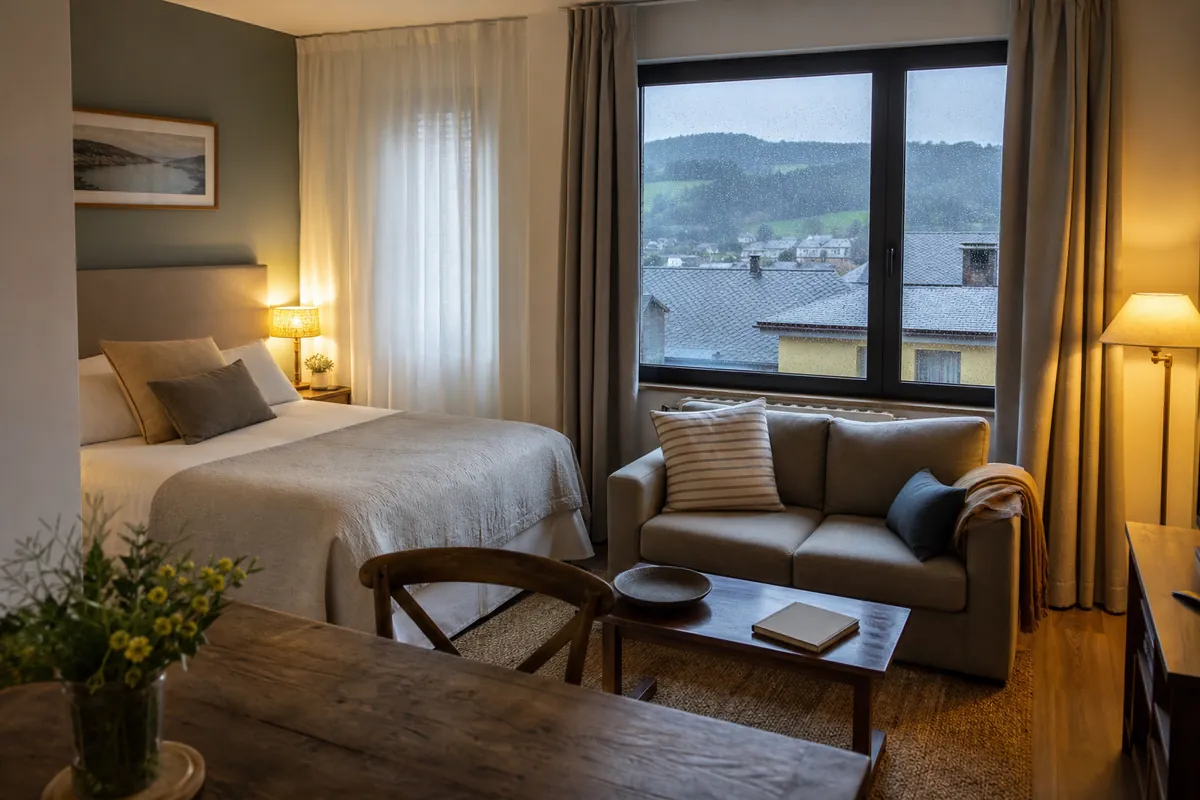
    Eventually, constant movement loses its charm. A small apartment-style hotel in western Asturias makes a useful base: enough room to unpack, a table for maps and snacks, and a window that turns rainfall into atmosphere rather than inconvenience.

    A warm apartment-hotel room overlooking green hills after rain
    The essential road-trip luxury: warmth, space and nowhere else to be. Fictional editorial illustration, not a photograph of a specific hotel.

    The pleasure of staying put is that the surrounding coast can be explored without luggage or deadlines. Puerto de Vega is close enough for a morning wander around the harbour. Luarca works for lunch and a long walk. The Senda Costera Naviega offers the purest version of the landscape: cliffs, fields, beaches and the Atlantic repeatedly disappearing and returning.

    What the road teaches you

    There are more spectacular drives in Europe and more famous coastal cities. What makes northern Spain special is the density of small rewards. A dramatic view rarely needs a ticket. A memorable meal may arrive in a room with fluorescent lighting. The hotel that feels best is often the one that lets wet coats dry and provides a proper table for tomorrow’s plan.

    The weather is part of the composition. Rain sharpens the slate roofs. Cloud gives the green landscape depth. When the sun breaks through, the entire coast seems to switch on at once.

    A deliberately incomplete itinerary

    • Begin in Bilbao, but leave enough daylight for the road.
    • Pause in Castro Urdiales for the harbour and old quarter.
    • Choose one Cantabrian stop rather than collecting them all.
    • Walk above Llanes before dinner.
    • Let Asturias slow the journey down with harbour towns and cliff paths.
    • Stay somewhere practical and warm, then explore without luggage.

    This is not a route to complete. It is a route to interrupt. Take the exit, order the local thing, walk until the weather changes and keep the Atlantic close. The long way west is not the detour. It is the destination.

    All photographs in this story are original editorial illustrations created for CloudOnFire. They evoke the journey without depicting a specific booking, property or private traveller.

  • Paella at HORTA, Amsterdam Zuid: Exactly the Right Kind of Excess

    Paella at HORTA, Amsterdam Zuid: Exactly the Right Kind of Excess

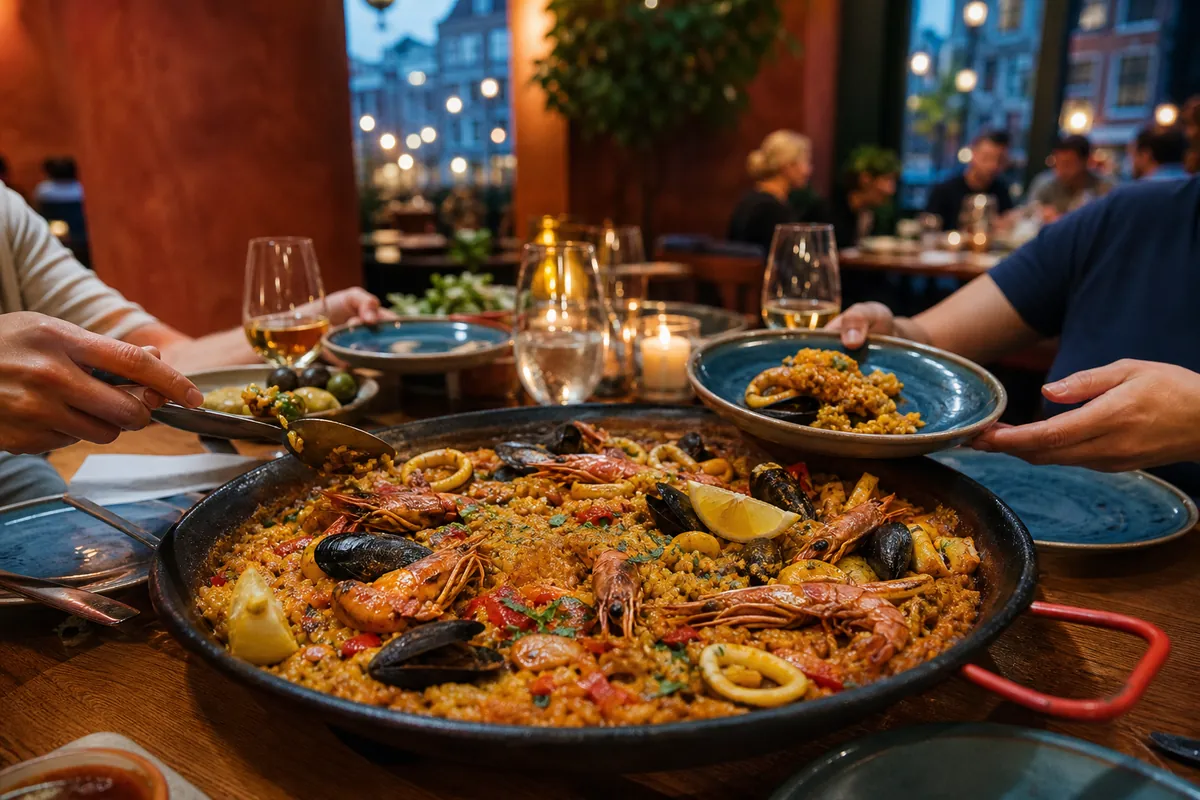
    A generous seafood paella shared at a warm restaurant table

    There are evenings that call for a delicate sequence of small plates. And there are evenings when someone should put an enormous pan of saffron rice in the middle of the table and let everybody become quiet for a moment.

    HORTA, the Spanish restaurant near Amsterdam Zuid, is built for the second kind of evening.

    The pan arrives

    Paella is theatre before it is dinner. You smell the toasted rice and stock first. Then come the prawns, mussels, squid, peppers and lemon, all competing for attention. The best part is the socarrat: that caramelised layer on the bottom of the pan that makes otherwise polite people negotiate over the final spoonful.

    At HORTA, the pleasure is in the sharing. Plates move around, wine gets poured, somebody claims they are completely full and then continues eating directly from the pan. It feels generous and celebratory without requiring a special occasion.

    Amsterdam outside, Spain at the table

    The area around Zuid can feel brisk and businesslike. That contrast makes a warm Spanish meal even better. Inside, the pace changes. Paella is not fast food, and waiting for it is part of the point: order a drink, argue about whether one more starter is sensible, and let the kitchen do its work.

    Is it subtle? Not particularly. Is that a problem? Absolutely not. Saffron, seafood, crispy rice, wine and friends are allowed to be obvious pleasures.

    Verdict: Go hungry, order for the table and defend your share of the socarrat.

    Restaurant: HORTA Amsterdam. Header photograph is an original editorial visual rather than a documentary photo of the restaurant.

  • MOTO STACK: A Filing Cabinet That Escaped and Became Sculpture

    MOTO STACK: A Filing Cabinet That Escaped and Became Sculpture

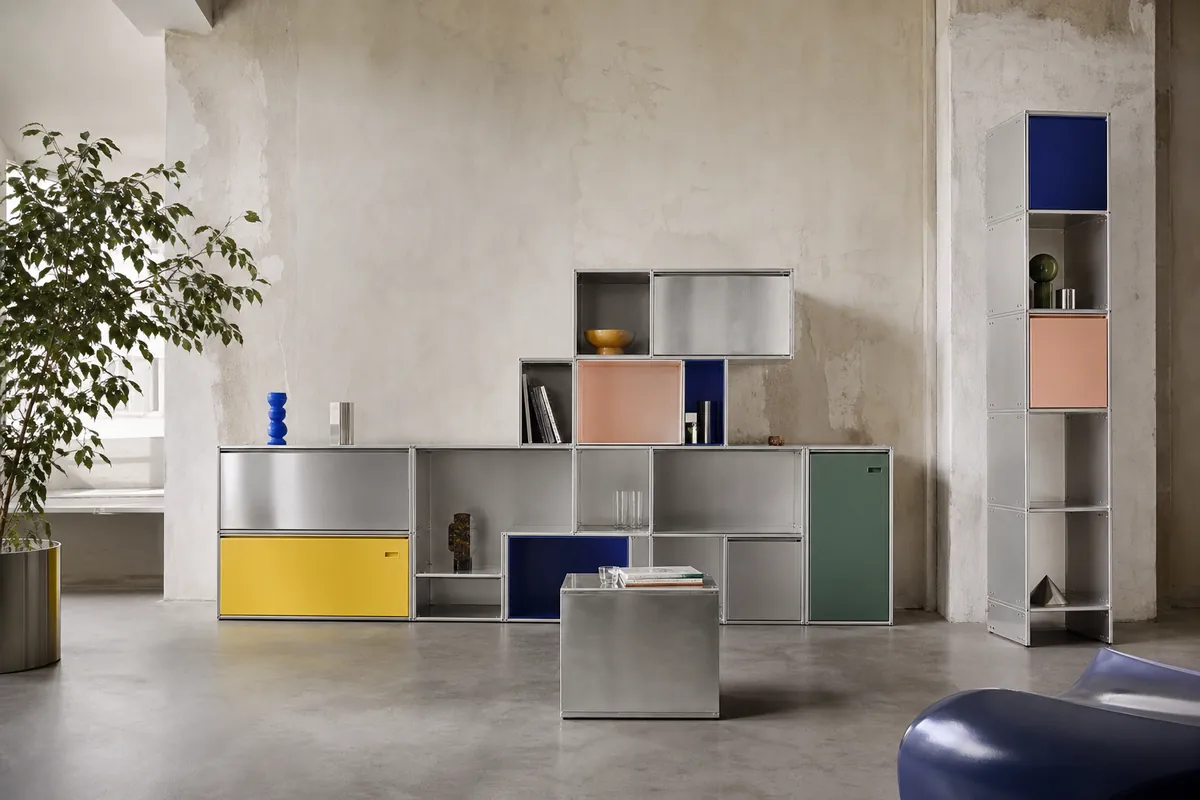
    A colorful modular aluminium cabinet system in a contemporary interior

    Most filing cabinets look as if they were designed to make paperwork feel even less exciting. STACK, the modular aluminium furniture system by Belgian architecture duo studio MOTO, takes the opposite approach. It turns storage into a construction kit.

    Architects Thomas Hick and Mo Vandenberghe originally wanted a timeless filing cabinet for their own office—something that could adapt when the room or their needs changed. Unable to find it, they designed it. The result grew into a family of cabinets, shelves, tables and wonderfully unnecessary-looking totems.

    No tools, just hands

    STACK’s cleverest quality is hidden inside its very obvious geometry. The aluminium elements click together without screws or permanent fixings. A configuration can be expanded, rearranged or dismantled as life changes. That makes the system feel less like a finished object and more like an alphabet.

    The brushed metal gives it industrial precision, but the colours stop it from becoming cold. Zinc yellow, peach pink, patina green and cobalt-blue panels turn practical storage into punctuation. One low cabinet can sit quietly against a wall; a tall asymmetrical composition can take over the entire room.

    Furniture for people who keep changing their minds

    Good modular furniture often disappears into the background. STACK refuses. It has the cheerful confidence of a piece of machinery that knows it also looks excellent with books, records, ceramics and one strangely shaped lamp.

    It is not minimalism in the joyless sense. It is orderly, but playful. Precise, but never corporate. And because it can be rebuilt instead of discarded, its flexibility is more than a styling exercise.

    Verdict: A filing cabinet went to architecture school, discovered colour and became the most interesting object in the room.

    Source: MOTO STACK’s official website. Header artwork is an original editorial visual.

  • Madonna’s Confessions II: The Dance Floor Is Sacred Again

    Madonna’s Confessions II: The Dance Floor Is Sacred Again

    A futuristic violet dance floor under a mirrored disco ball

    Some records arrive politely. Confessions II kicks open the club doors in a cloud of violet light and demands that everybody move.

    Released on 3 July 2026 through Warner Records, Madonna’s fifteenth studio album is a spiritual sequel to 2005’s Confessions on a Dance Floor. More importantly, it reunites her with producer Stuart Price—and that reunion feels less like nostalgia than unfinished business.

    The original Confessions treated the album as one long night out: seamless, euphoric and just melancholic enough to keep the glitter from becoming empty decoration. Its successor understands the same essential truth. Great dance music is not background noise. It is architecture for bodies, memories and reinvention.

    Back under the mirror ball

    The opening track, “I Feel So Free,” sets out the record’s intentions immediately. Synths rise and circle; the beat moves with purpose; Madonna sounds as if she has rediscovered a room she never truly left. The continuous flow gives the album a wonderfully old-fashioned confidence: this is something to play from beginning to end, preferably loudly and after dark.

    The official release came in an almost comical number of editions—standard and deluxe vinyl, CDs, cassette, digital versions, instrumentals and several special editions. Normally that might feel excessive. For Madonna, excess is part of the grammar.

    Why it works

    What makes Confessions II fantastic is not simply that it resembles a beloved record. It remembers why the original worked. The dance floor can hold pleasure and grief at the same time. Repetition becomes ritual. A bassline can be both ridiculous and profound.

    Twenty-one years later, Madonna is not pretending that time stood still. She is using the club as a place where time briefly stops mattering. That is a much more interesting proposition—and a very Madonna one.

    Verdict: Put away the tasteful playlist. Turn off shuffle. Let the whole thing run.

    Sources: Madonna’s official announcement and official album formats. Header artwork is an original editorial illustration.

  • Technics SL-1210MK7: The Swiss Army Knife of Turntables

    Technics SL-1210MK7: The Swiss Army Knife of Turntables

    Some gear is just built to last, and the Technics SL-1210MK7 proves it. A legendary name in the vinyl world, this deck is as tough as they come, with a bulletproof build, silky-smooth operation, and killer sound. Whether you’re an audiophile or a DJ, this turntable brings pure, unfiltered joy to your music setup.

    🔥 What’s Hot:

    ✔ Rock-solid build – Feels like it could survive a nuclear blast.

    ✔ Insane value – A pro-level deck that won’t drain your wallet.

    ✔ User-friendly – Precise tonearm adjustments, pitch control, and even a pop-up stylus light.

    ⚡ What’s Not:

    ✖ No cartridge included – You’ll need to bring your own.

    ✖ Not the most ‘audiophile’ look – But let’s be real, this thing is a beast.


    What’s the Deal?

    First released in 1972, the Technics SL-1200 was originally designed as a hi-fi turntable before becoming the go-to deck for DJs worldwide. The SL-1210MK7 keeps that legacy alive with a coreless direct drive motor (goodbye, cogging issues), adjustable start/stop speeds, and even reverse play for the scratch artists out there.

    The classic pitch control and strobe light are still here, with the option to switch between red and blue. Around the back, you’ve got RCA connections, a separate ground wire, and a detachable power cable—all upgrade-friendly for tweak lovers.


    Setup & First Spin 🎶

    Setting up the SL-1210MK7 is stupidly simple. Mount the platter, pop in a cartridge (we tested Audio Technica VM530EN & VM540ML), tweak tracking force and anti-skating, and you’re ready to roll.

    From the moment the stylus drops, this deck means business. It’s got punchy, full-bodied bass, super-stable timing, and a smooth, natural flow. Tracks like Into The Labyrinth by Dead Can Dance felt powerful and immersive, while Me & Mr. Jones by Amy Winehouse had lush vocals and crisp drums. It’s solid, engaging, and just plain fun.

    Want a more refined sound? Swap out the cartridge. The VM530EN brings airiness and detail, while the VM540MLadds depth and smooth control—both sound fantastic.


    Final Verdict 🏆

    The SL-1210MK7 isn’t just another turntable—it’s a no-nonsense, built-to-last machine that makes spinning records effortless and fun. It delivers big sound, rock-solid performance, and endless tweakability. At €950, it’s a steal for anyone who loves serious vinyl playback—whether you’re mixing beats or just kicking back with your favorite LPs.

    🎵 Technics SL-1210MK7 – The legend lives on. And yeah, I’m gonna miss this one.

    Keep exploring

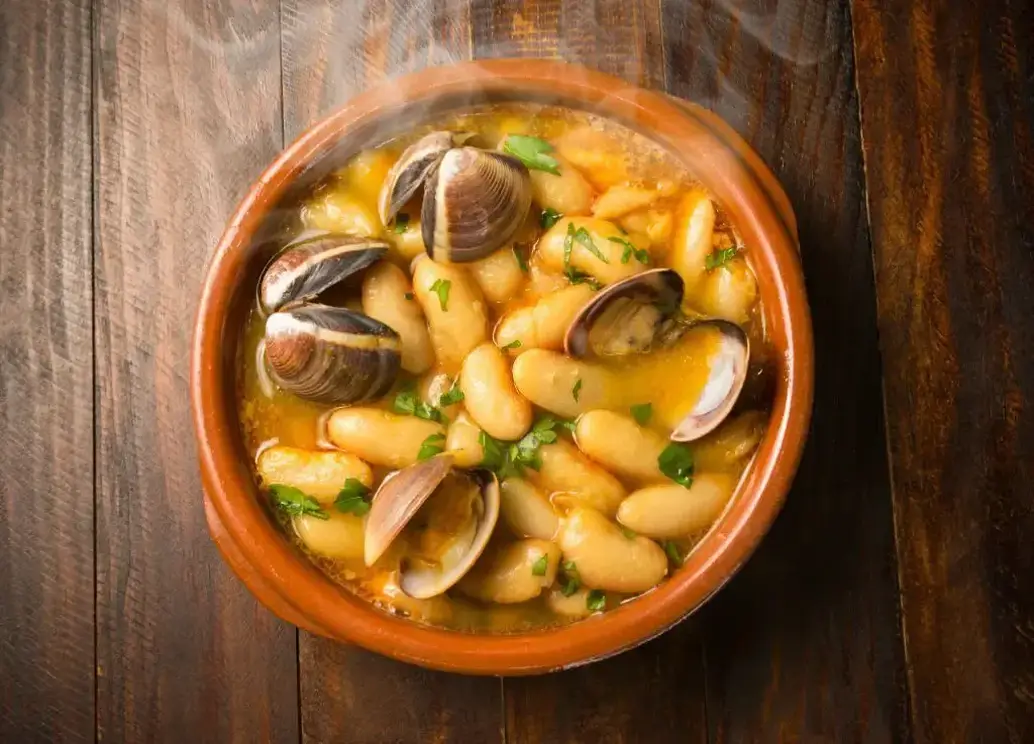
  • Fabes con Almejas (Asturian Beans with Clams) – A Comforting Spanish Classic

    Fabes con Almejas (Asturian Beans with Clams) – A Comforting Spanish Classic

    A deeply comforting dish from Asturias, Spain, Fabes con Almejas combines buttery white beans with fresh clams in a rich, flavorful broth. Slow-cooked to perfection, this traditional recipe is the essence of Spanish home cooking. Serve with crusty bread and a glass of Asturian cider for an authentic experience!


    🕒 Prep & Cooking Time

    • Prep Time: 15 minutes (+12-18 hours soaking time for beans)

    • Cook Time: 2 hours 30 minutes

    • Servings: 4


    📌 Ingredients

    For the Beans (Les Fabes):

    • 500g dried Asturian faba beans (or high-quality white beans)

    • 1 sweet onion

    • 1 large leek

    • 3 medium carrots, peeled

    • 4 garlic cloves, peeled

    • 4 bay leaves

    • A drizzle of olive oil

    • Water or seafood broth (enough to cover the beans)

    • Salt, to taste

    For the Clams:

    • 700g fresh clams (preferably Galician clams)

    • 1 sweet onion, finely chopped

    • 3 garlic cloves, minced

    • 1 tsp sweet paprika (or 4-5 strands of saffron)

    • 1 tbsp wheat flour

    • 125ml dry white wine

    • Olive oil (for frying)

    • 1 large cayenne pepper (optional, for spice)

    • Fresh parsley, chopped

    • Salt, to taste


    📌 Instructions

    Step 1: Soak the Beans (The Night Before)

    1. Rinse the dried beans under cold water.

    2. Place them in a large bowl and cover with plenty of cold water (they absorb a lot).

    3. Leave to soak for 12-18 hours.


    Step 2: Cook the Beans

    1. Drain the soaked beans and place them in a large pot.

    2. Add fresh water or seafood broth—enough to cover them, plus an extra 2 fingers’ width.

    3. Bring to a boil over high heat, then reduce to low heat.

    4. Add onion, leek, carrots, garlic, a drizzle of olive oil, and bay leaves.

    5. Cook gently for 2 hours, stirring only by shaking the pot (not with a spoon) to prevent breaking the beans.

    6. After 45 minutes, add salt to taste.

    7. Once cooked and tender, remove the vegetables from the pot and discard.


    Step 3: Prepare the Clams

    1. While the beans cook, rinse the clams thoroughly under cold water.

    2. Place them in a bowl of cold salted water and let them soak for 2 hours to remove sand.

    3. Just before cooking, drain and rinse the clams.


    Step 4: Cook the Clams

    1. In a large pan, heat a drizzle of olive oil over medium-low heat.

    2. Add garlic and onion, cooking for 5-7 minutes until soft (but not browned).

    3. Stir in paprika or saffron, crushed cayenne, and flour, mixing well.

    4. Pour in white wine, add clams, and season with salt.

    5. Cover with a lid and cook for 2-3 minutes until the clams open. Discard any that remain closed.

    6. Stir in fresh parsley and mix.


    Step 5: Combine & Serve

    1. Gently pour the cooked clams and their flavorful broth into the pot of beans.

    2. If needed, add a little reserved bean broth to achieve a creamy consistency.

    3. Simmer for 3-4 minutes over low heat to let the flavors meld.

    4. Remove from heat and let rest for 15 minutes before serving.

    ✅ Serve hot in rustic earthenware bowls, with crusty bread and a glass of Asturian cider! 🍷


    📌 Tips & Notes

    • Always soak dried beans—this shortens cooking time and ensures a creamy texture.

    • Slow cooking is key—never boil beans too hard, or they’ll break.

    • Move the pot, don’t stir! Stirring with a spoon can break the beans.

    • Use fresh clams, ideally bought on the same day.

    • Don’t skip soaking the clams! It removes any grit or sand.

    • For extra flavor, blend some of the cooked vegetables and add them back to the broth.


    Why You’ll Love This Recipe

    ✔ Traditional & Authentic – A taste of real Asturian cuisine.

    ✔ Slow-Cooked Comfort – Perfect for cozy, hearty meals.

    ✔ Rich & Flavorful – The beans absorb the seafood broth beautifully.

    Enjoy this classic Spanish dish—deeply comforting, packed with flavor, and perfect for sharing! 🇪🇸🍲

    Keep exploring

  • Quick & Easy Sesame Prawn Toast Recipe

    Quick & Easy Sesame Prawn Toast Recipe


    🕒 Prep Time: 10 mins
    
    🔥 Cook Time: 5 mins
    
    🍽 Servings: 12 pieces


    Ingredients:

    • 200g raw prawns (de-veined, de-shelled)
    • 1 tsp minced ginger
    • 2 cloves garlic (minced)
    • 1 egg white
    • 2 spring onions, chopped
    • 1 tsp light soy sauce
    • ¼ tsp white pepper
    • ¼ tsp salt
    • 3 slices thick white bread (cut into triangles)
    • 6 tbsp sesame seeds
    • 1L vegetable oil (for frying)

    To Serve:

    • 1 tbsp chopped fresh coriander (optional)
    • 2 tbsp sweet chili sauce


    Instructions:

    1. Prepare the filling: In a mini food processor, blend the prawns, ginger, garlic, egg white, spring onions, soy sauce, salt, and white pepper into a smooth paste.

    2. Cut & spread: Slice the bread into triangles and evenly spread a heaped tablespoon of prawn paste onto one side of each.

    3. Coat with sesame: Dip the prawn-covered side into sesame seeds, ensuring an even layer.

    4. Fry to perfection: Heat the oil in a deep pan or wok (test with a small piece of bread—it should sizzle). Fry triangles prawn-side down for 1-2 minutes, flip, then fry for another 30-60 seconds until golden brown.

    5. Serve hot: Drain on kitchen paper, sprinkle with coriander, and serve with sweet chili sauce.


    Pro Tips & Storage:

    ✔ Make Ahead: The prawn mixture can be refrigerated for up to 4 hours before spreading onto bread.

    ✔ Freezing: Fry, cool, and freeze in an airtight container. Reheat at 200°C (400°F) for 7-8 minutes.

    ✔ Baking Option: Brush the bread side with oil and bake at 240°C (475°F) for 10 minutes, flipping halfway.


    Why You’ll Love It:

    ✔ Crispy & Flavorful – The perfect crunch with juicy prawn filling.

    ✔ Fast & Easy – Ready in 15 minutes.

    ✔ Better Than Takeaway – No more oily, skimpy prawn toast!

    Make a batch, dip in sweet chili sauce, and enjoy every crunchy, sesame-coated bite! 🍤✨

    Keep exploring

  • Hands-On with the new Mac mini M4 Pro

    Hands-On with the new Mac mini M4 Pro

    [vc_column_text]

    M4 Pro Overview

    The Mac mini, turning 20 this January, has reached new heights with the M4 and M4 Pro versions, surpassing all previous models in value and performance. The original M1 model offered entry to the Mac ecosystem but often lacked power. The new M4 Mac mini, priced at €599, changes this narrative, offering unparalleled speed and capability for its price. The M4 Pro version is a compact workstation without compromises.

    Design & Ports

    The Mac mini’s footprint has shrunk to approximately 12.7 × 12.7 cm, with its height increased to about 5.08 cm.

    Its all-aluminum design now features ports integrated directly into the metal. Front USB-C ports replace USB-A, offset by an additional Thunderbolt port, boosting connectivity.

    Performance

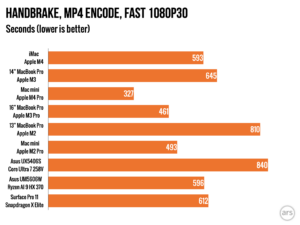
    The M4 chip shows up to 60% better single-core performance and up to 70% better multi-core performance than the M1, with improved power efficiency. The M4 Pro’s 10 P-cores and 4 E-cores deliver a 50-60% increase over its predecessor and approach the M1 Ultra’s performance. High Power mode provides minor benefits but increases noise.


    Display Support

    The M4 mini supports three monitors, outperforming its predecessors. The M4 Pro drives three 6K displays or one 8K display with another 6K.

    Pros & Cons

    Pros:

    •Compact, powerful design

    •Excellent entry-level and pro-level options

    •Front-mounted ports improve accessibility

    •Supports multiple displays

    Cons:

    •Loss of USB-A ports

    •Fewer Thunderbolt ports on M4 Pro

    •Expensive storage and RAM upgrades

    •High Power mode adds noise without significant performance gain

    Drawback: The bottom-mounted power button may inconvenience some users.

    [/vc_column_text]

    Keep exploring

  • How I use Authelia

    How I use Authelia

    How I use Authelia

    I use Authelia as an Identity Provide in my network. That means that everyone who wants to use resources (such as Jellyfin or Gitea or Nextcloud) or who wants to “traverse” VLANs (e.g. to manage an OpenWrt router or switch or my Proxmox VE) has to login first. Authelia was my product of choice because

    • It is free and Open Source Software (FOSS)
    • It can act as an OpenID Connect (OIC) Identity provider
    • It can be integratet into an NGINX reverse proxy
    • It supports Two Factor Authentication (2FA) with Time based One Time Passwords (TOTP) or Fido2 compatible Keys such as the Yubikey.

    Installing Authelia on Proxmox

    I set up a small LXC container running Debian Bullseye (Debian 11) on Proxmox. It needs to be privileged because it needs to have access to /dev/urandom or /dev/random for the generation of random numbers.
    Then we need to install some software, add the authelia repos and finally install authelia:

    # run as root
apt update
apt install -y curl gnupg apt-transport-https sudo
curl -s https://apt.authelia.com/organization/signing.asc | sudo apt-key add -
echo "deb https://apt.authelia.com/stable/debian/debian/ all main" >>/etc/apt/sources.list.d/authelia.list
apt-key export C8E4D80D | sudo gpg --dearmour -o /usr/share/keyrings/authelia.gpg
apt update
apt install -y authelia

    Configuration of Authelia

    I mostly followed this guide here by Florian Mueller

    for the configuration. Basically we create sub-directories for all secrets and auto-generate them, create keys and add the secrets to the environment of authelia (the below is a shortened version of Florian’s scripts)

    important note The scripts below use a single SQLITE file rather than mysql! Also, no OIDC provider is configured – just a dummy entry. Please see the implications of this here


    for i in .secrets .users .assets .db ; do mkdir /etc/authelia/$i ; done
for i in jwtsecret session storage smtp oidcsecret redis ; do tr -cd '[:alnum:]' < /dev/urandom | fold -w "64" | head -n 1 | tr -d '\n' > /etc/authelia/.secrets/$i ; done
openssl genrsa -out /etc/authelia/.secrets/oicd.pem 4096
openssl rsa -in /etc/authelia/.secrets/oicd.pem -outform PEM -pubout -out /etc/authelia/.secrets/oicd.pub.pem
(cat >/etc/authelia/secrets) <<EOF
AUTHELIA_JWT_SECRET_FILE=/etc/authelia/.secrets/jwtsecret
AUTHELIA_SESSION_SECRET_FILE=/etc/authelia/.secrets/session
AUTHELIA_STORAGE_ENCRYPTION_KEY_FILE=/etc/authelia/.secrets/storage
AUTHELIA_NOTIFIER_SMTP_PASSWORD_FILE=/etc/authelia/.secrets/smtp
AUTHELIA_IDENTITY_PROVIDERS_OIDC_HMAC_SECRET_FILE=/etc/authelia/.secrets/oidcsecret
AUTHELIA_IDENTITY_PROVIDERS_OIDC_ISSUER_PRIVATE_KEY_FILE=/etc/authelia/.secrets/oicd.pem
EOF
chmod 600 -R /etc/authelia/.secrets/
chmod 600 /etc/authelia/secrets
(cat >/etc/systemd/system/authelia.service) <<EOF
[Unit]
Description=Authelia authentication and authorization server
After=multi-user.target

[Service]
Environment=AUTHELIA_SERVER_DISABLE_HEALTHCHECK=true
EnvironmentFile=/etc/authelia/secrets
ExecStart=/usr/bin/authelia --config /etc/authelia/configuration.yml
SyslogIdentifier=authelia

[Install]
WantedBy=multi-user.target
EOF
systemctl daemon-reload

    create the user file

    Next, we create a rudimentary User database yaml file with randomly generated passwords (the users can reset them with the “forgot password” link):

    echo "users:" > /etc/authelia/.users/users_database.yml
for user in bob alice dave frank ; do
  randompassword=$(tr -cd '[:alnum:]' < /dev/urandom | fold -w "64" | head -n 1 | tr -d '\n')
  encryptedpwd=$(authelia hash-password --no-confirm   -- $randompassword  | cut -d " " -f 2)
  ( 
    echo "  ${user}:" 
    echo '    displayname: "First Last"'
    echo "    password: $encryptedpwd"
    echo "    email: ${user}@yourdomain.com"
  ) >> /etc/authelia/.users/users_database.yml
done
chmod 600 -R /etc/authelia/.users/

    create the configuration.yml

    Now we need to create a configuration file for authelia in /etc/authelia/configuration.yml

    cd /etc/authelia
# save the old version of the file
if [ -e configuration.yml ] ; then
  mv configuration.yml configuration.yml.old
fi
# Now let's use Marc's version of Florian's Template File for the new config:
wget https://raw.githubusercontent.com/onemarcfifty/cheat-sheets/main/templates/authelia/configuration.yml
chmod 600 configuration.yml

    Starting Authelia for the first time

    There we go – authelia should be able to run already – if you do

    systemctl start authelia
systemctl status authelia

    you should see all green and be able to browse to http://localhost:9091 and see the authelia login prompt. Even though this is an important checkpoint (in the sense that we can see if authelia will run at all), we can’t really use it yet. We need to take care of the following things:

    1. All domain names still point to example.com
    2. The start up checks are disabled (especially checking for an e-mail Server)

    You will need a real e-Mail account / Server for Authelia to work correctly (Users need this to reset their password and to register 2FA devices)

    1. We have no TLS enabled
    2. The policies need to be adapted
    3. We need to increase the security and hide Authelia behind an NGINX Server
    4. We need to harden the server
    5. The user accounts are not real

    Adapting and securing authelia

    to get a first idea of how much you need to change do grep example.com /etc/authelia/configuration.yml – that shows you all the lines where we specified the example.com domain.

    Enabling the startup checks and change the domain names

    The first one is the mail server. We need to edit the configuration.yml and give it the login data of a real mail server. This is done in the notifier section of the config:

    notifier: 
  disable_startup_check: true
  smtp:
    host: smtp.domain.com
    port: 465
    timeout: 5s
    username: noreply@auth.example.com
    sender: "Authentication Service <noreply@auth.example.com>"
    subject: "{title}"
    startup_check_address: noreply@auth.example.com

    Change all the settings to reflect a real mailbox that you control. Once you have done that, change the disable_startup_check: true to disable_startup_check: false and restart authelia:

    systemctl restart authelia
systemctl status authelia


    If you see errors, i.e. Authelia idn’t start then that’s because now it checks if it can log into the mailbox at startup. Reminder: The password it uses for the mailbox Server is in /etc/authelia/.secrets/smtp

    Onc Authelia starts, move on to the next step.

    TLS

    Before we can really use Authelia, we need to provide it with realSSL certificates. Use your own or get them from letsencrypt.

    Once you have copied the certificate and key to the server, adapt the configuration.yml file:

    server:
  host: 0.0.0.0
  port: 9091
  asset_path: /etc/authelia/.assets/
  tls:
    key: /etc/authelia/certs/server.key
    certificate: /etc/authelia/certs/server.crt


    Basically I’ve just added the tls section and point it to the certificates. Again – restart Authelia, check the status. If it starts and if you can browse to https://...:9091 rather than http...then you can move to the next step.

    bind port

    For the moment Authelia listens on any interface, i.e. we can browse to port 9091 from the outside. We will however hide it behind an NGINX server. For this, Authelia should only listen to the localhost interface. Change the configuration.yml from

    server:
  host: 0.0.0.0
  port: 9091


    to

    server:
  host: 127.0.0.1
  port: 9091


    Restart and check – you should not be able to browse to it from the outside.

    Hiding Authelia behind NGINX

    In this step we install NGINX, let it listen to the outside world on port 443 and forward all requests to Authelia on the local host. You can use the templates from My cheat sheet repo on Github

    # install nginx
apt install -y nginx
# stop NGINX
systemctl stop nginx
# remove the default site
rm /etc/nginx/sites-enabled/*
# download the templates from Marc's cheat sheets
wget https://raw.githubusercontent.com/onemarcfifty/cheat-sheets/main/templates/nginx/authelia/siteconf -O /etc/nginx/sites-available/authelia.conf
wget https://raw.githubusercontent.com/onemarcfifty/cheat-sheets/main/templates/nginx/authelia/proxy-snippet -O /etc/nginx/snippets/proxy.conf
wget https://raw.githubusercontent.com/onemarcfifty/cheat-sheets/main/templates/nginx/authelia/ssl-snippet -O /etc/nginx/snippets/ssl.conf
# link back the authelia site as enabled to NGINX 
ln -s /etc/nginx/sites-available/authelia.conf /etc/nginx/sites-enabled/authelia.conf
# restart NGINX
systemctl start nginx


    adapting the policies

    The template file contains three sample policies for bypass, one factor and two factor. You will want to adapt these to your needs. My Server only has one policy:

    access_control:
  default_policy: deny
  rules:
    - domain: '*.mydomain.com'
      policy: two_factor


    Last but not least

    The last steps are

    • harden the server
    • make the user accounts real

    Server hardening is not in the scope of this article. Basically at least you should do the following:

    1. Lock down the firewall to only let pass port 443 tcp incoming (optionally port 67 UDP if you use dhcp and port 22 tcp if you want to access the server via ssh)
    2. disable / expire the password of the root account
    3. Create a non-root user for login who has sudo capabilities with a loooong password
    4. switch off password authentication and root login for sshd

    Now just review the settings in the /etc/authelia/.users/users_database.yml and make sure that the user accounts are real accounts with real mail addresses.

    That’s it – you’re all set and can now use Authelia in front of your servers with NGINX/Traefik/Caddy or the like and/or add OIDC providers for Proxmox, Gitea, Portainer, Nextcloud and so on…

    Keep exploring